Groups
The Groups feature is a key element of the user management system, enabling Workspace Owners, as Super Admins, to implement strict privacy controls. Users can be organized into specific groups that remain hidden from other Workspace Members. Only the Workspace Owner has the authority to view and manage these groups, while selective access can be granted to designated Workspace Members. This ensures that sensitive user information is kept confidential and visible only to authorized individuals, adding an additional layer of security.

Create a Group
Every workspace starts with one default group called 'Everyone', and all newly created users are automatically assigned to this group. Users cannot be removed from the 'Everyone' group.
Steps to Create a New Group:
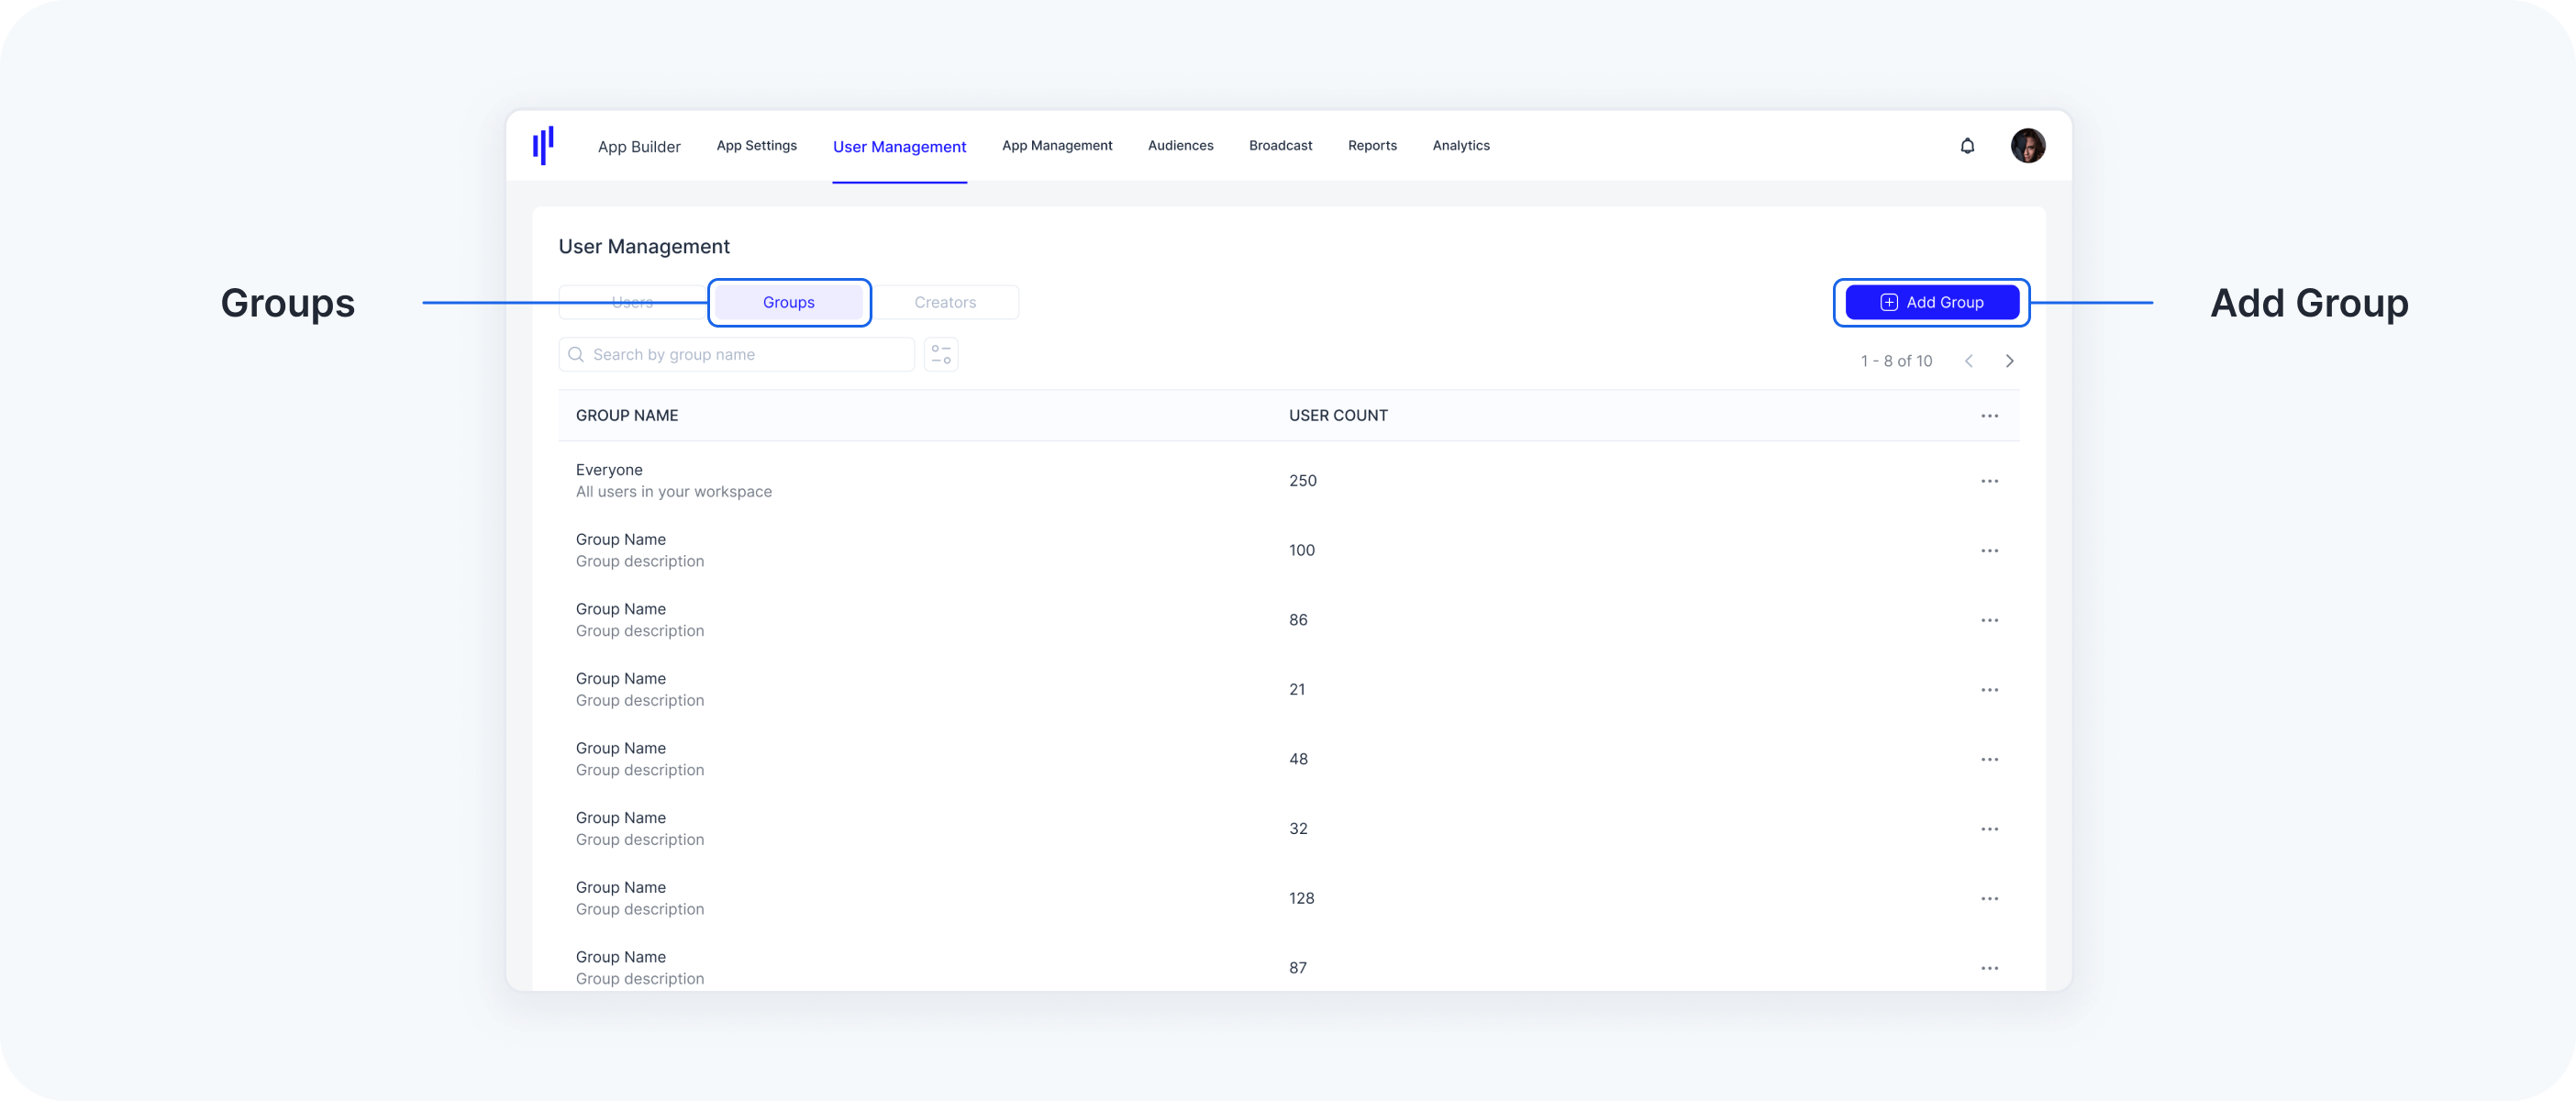
- Navigate to User Management.
- Go to the Groups tab.
- Click on the Add Group button.
- Enter the new group name and click Add Group.
Your newly created group will now appear under the Groups tab.
Add Users to a Group
To efficiently manage user access and permissions, Workspace Owners can add users to specific groups.
Steps to Add Users to a Group:
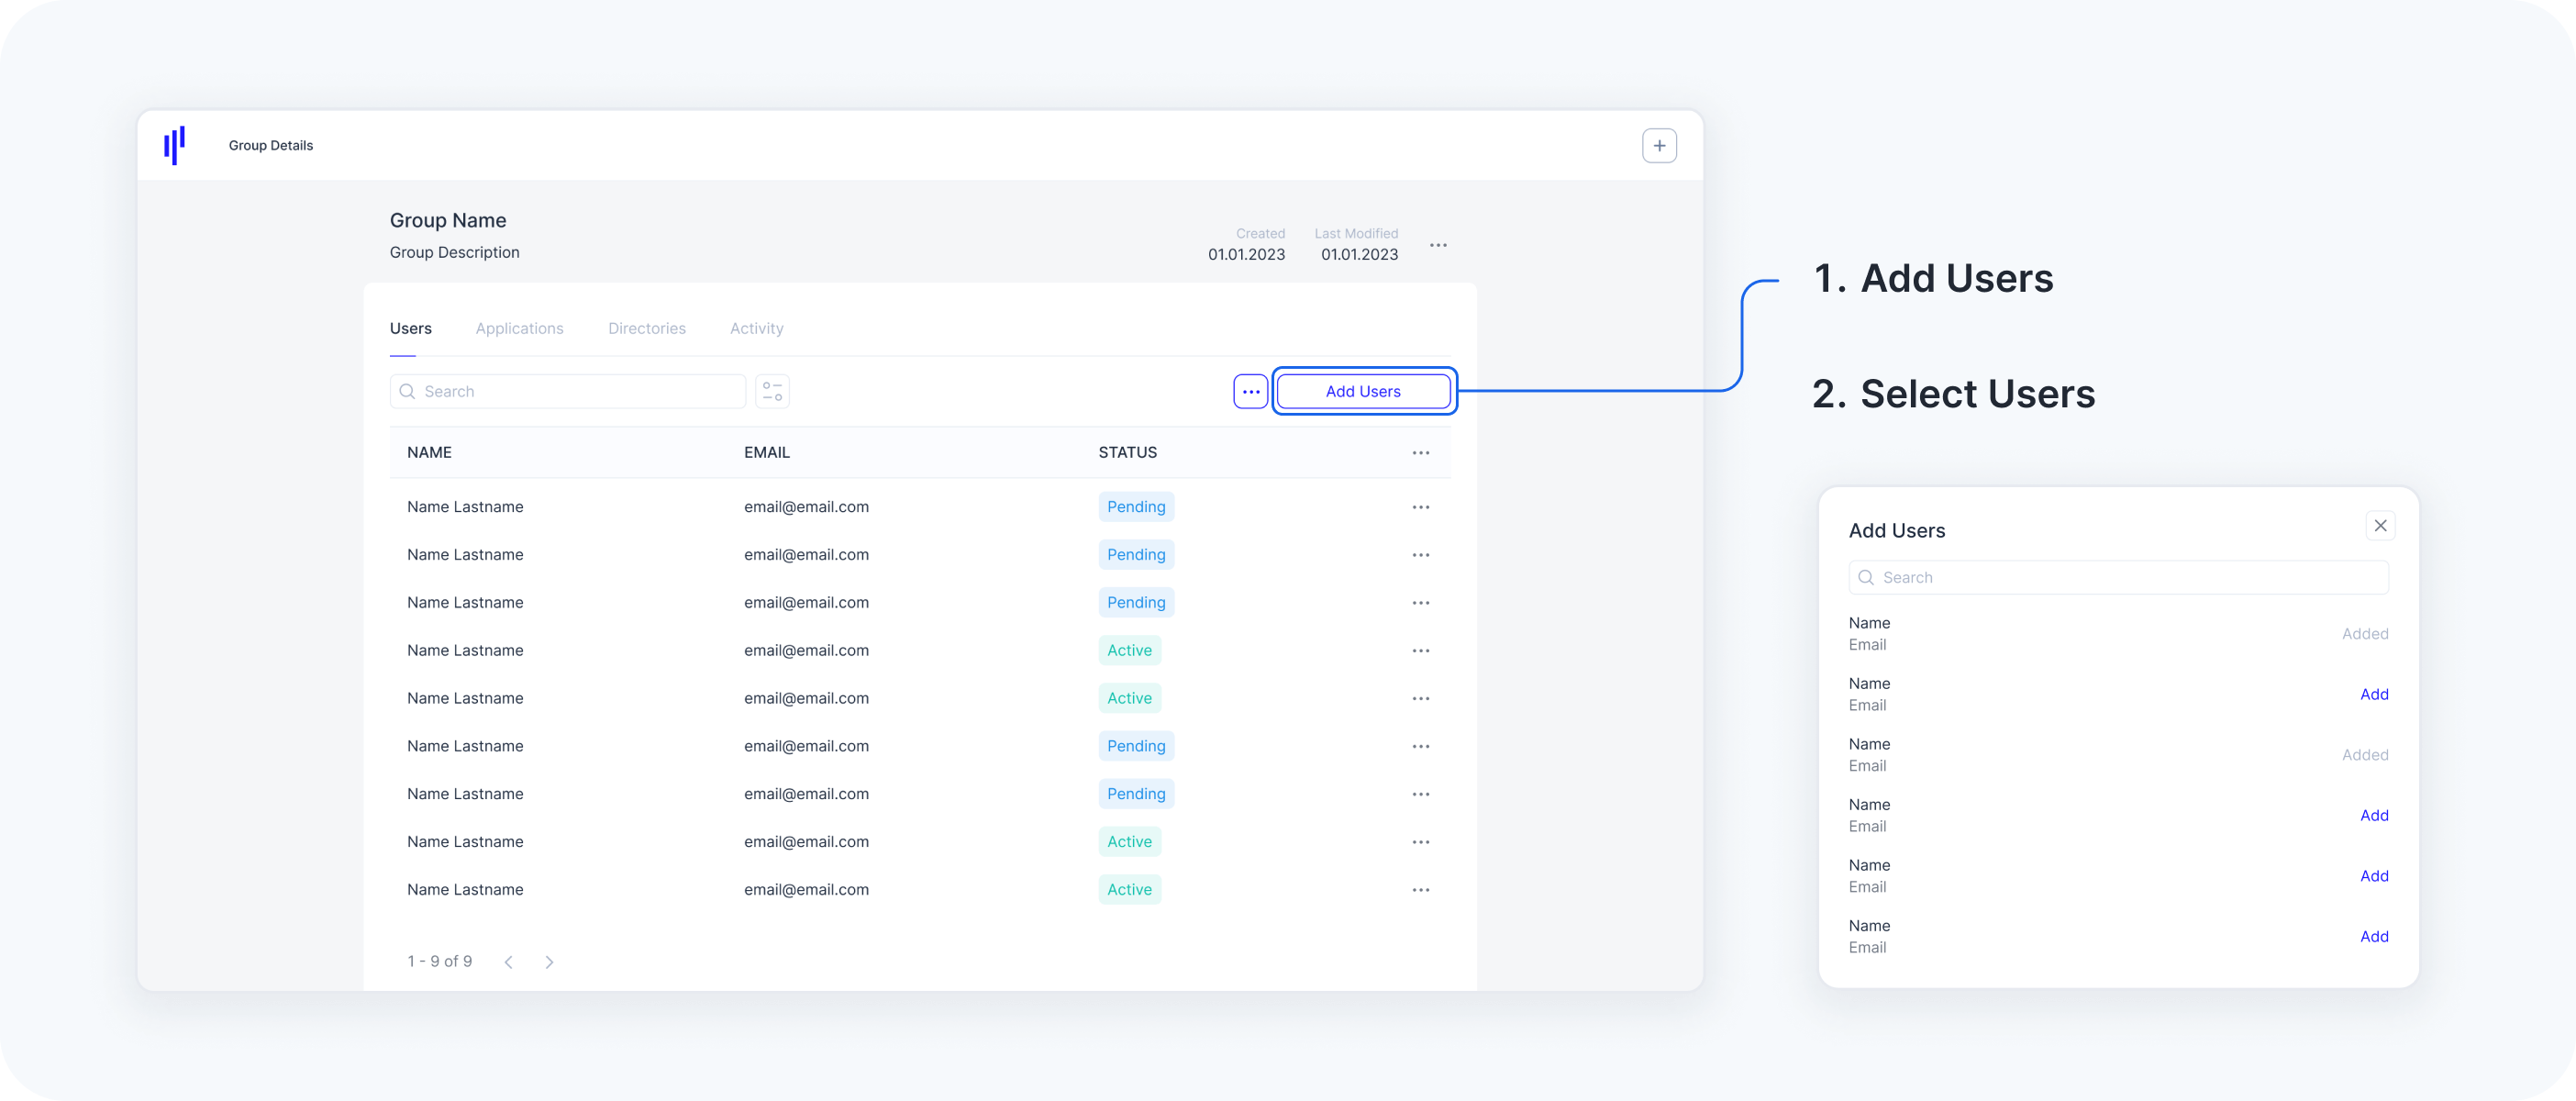
- Navigate to User Management.
- Go to the Groups tab.
- Click on the desired group.
- Select View Group Details from the additional actions.
- Click on the Add Users button.
- Search for the user you want to add to the group.
- Click the Add button next to the user's name.
The user is now added to the group.
Note: Multiple users can be added at once without closing the Add Users window.
Remove Users from a Group
Workspace Owners can remove users from specific groups. Removing a user from a group will revoke any group-specific permissions associated with that group.
Steps to Remove a User from a Group:
- Navigate to User Management.
- Go to the Groups tab.
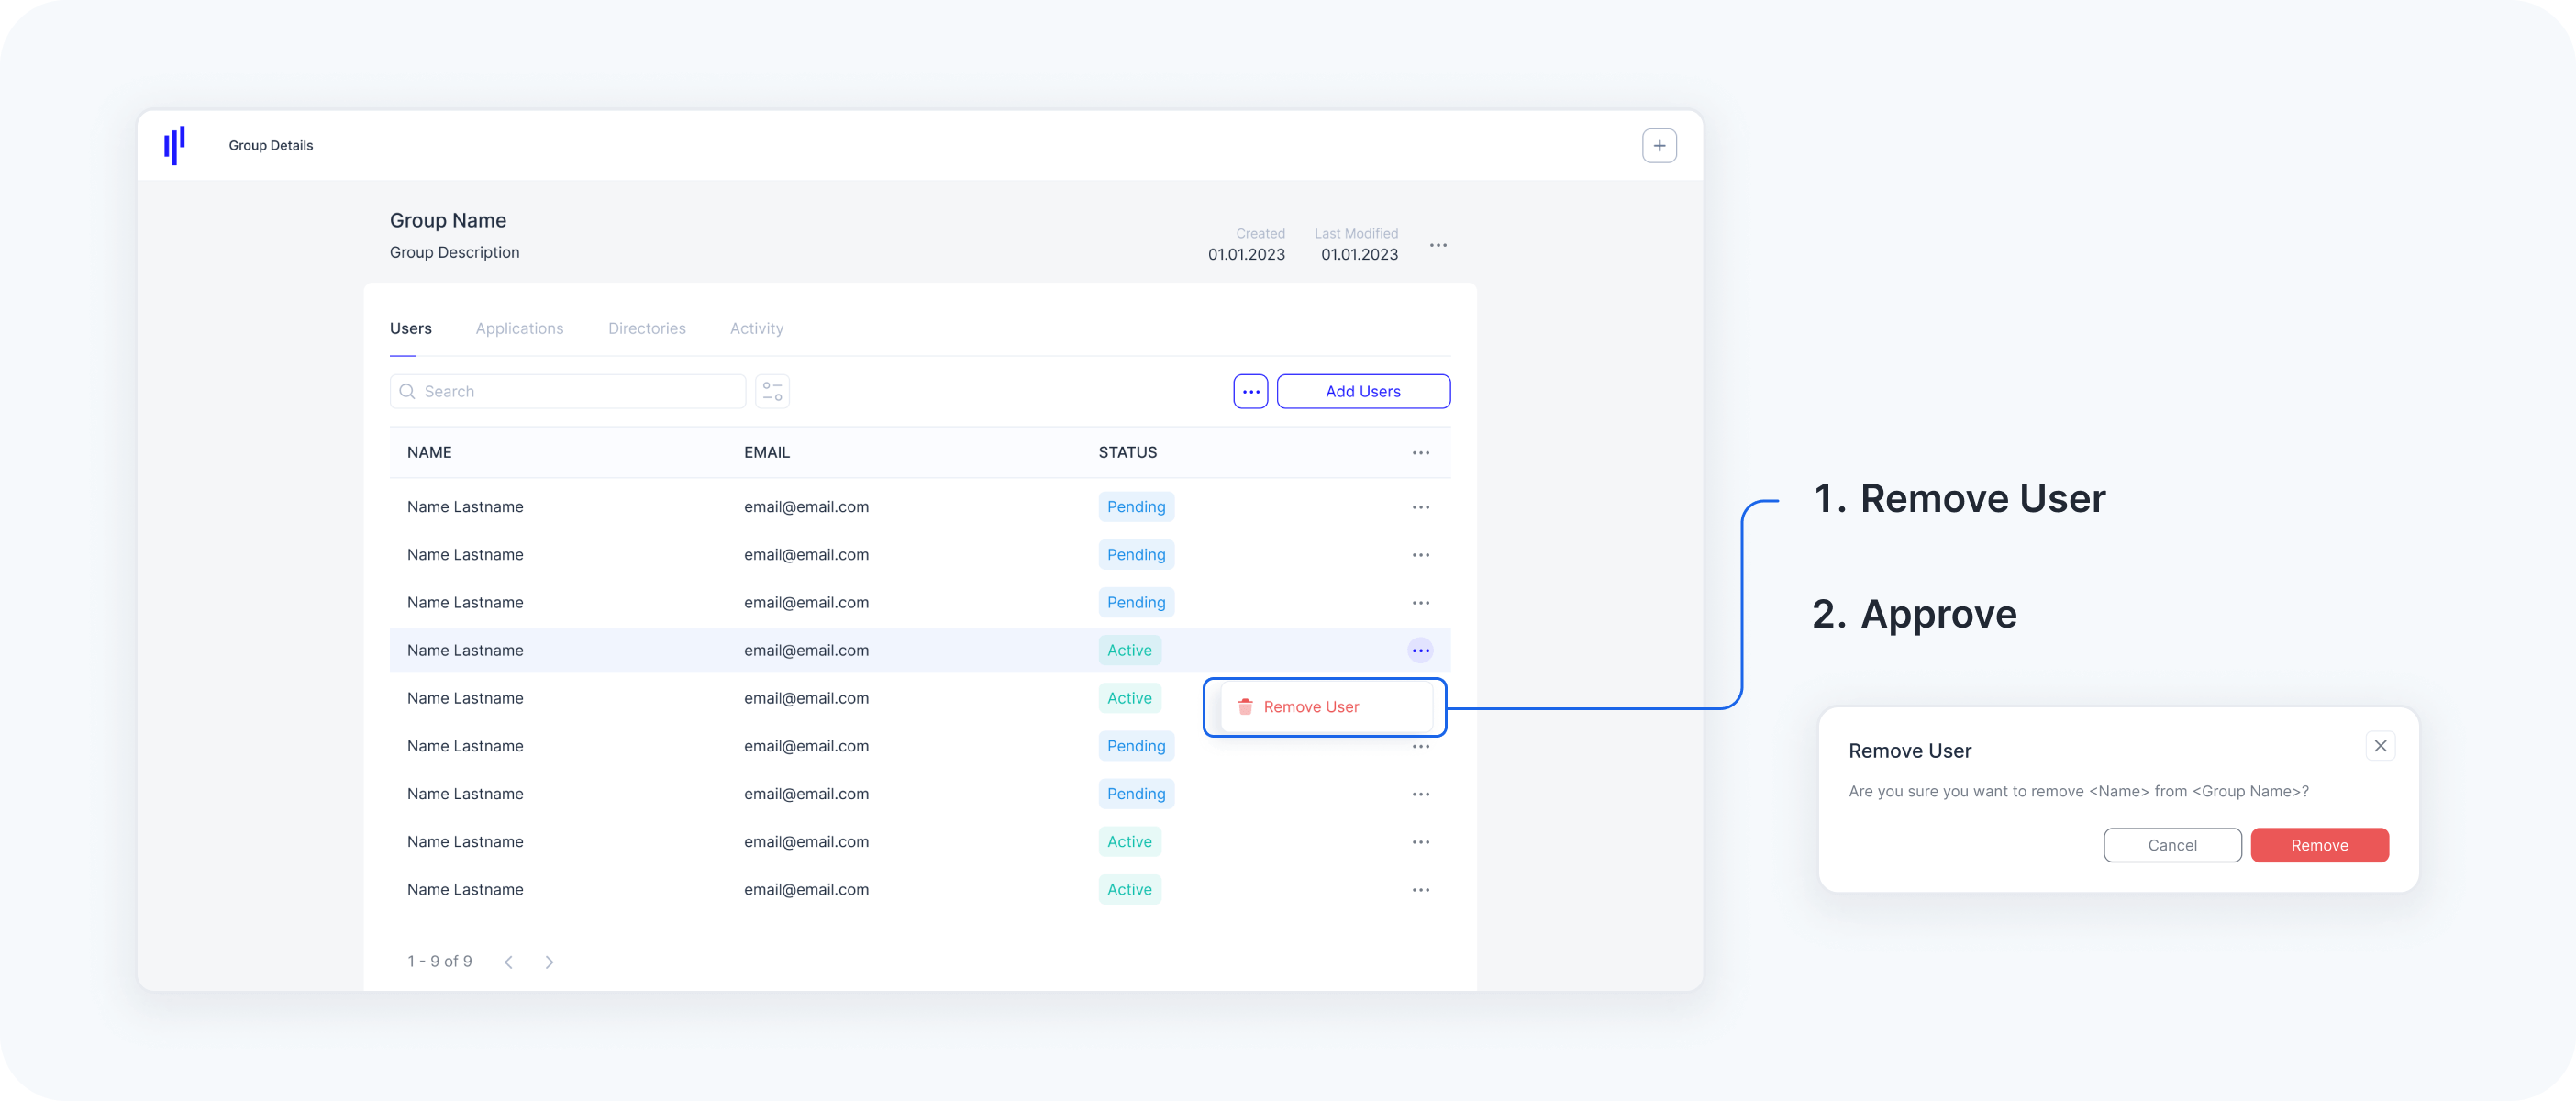
Click on the group and select View Group Details from the dropdown menu.
Search for and click on the user, then select Remove User from the dropdown menu.
- Approve the confirmation pop-up.
The user has now been removed from the group.
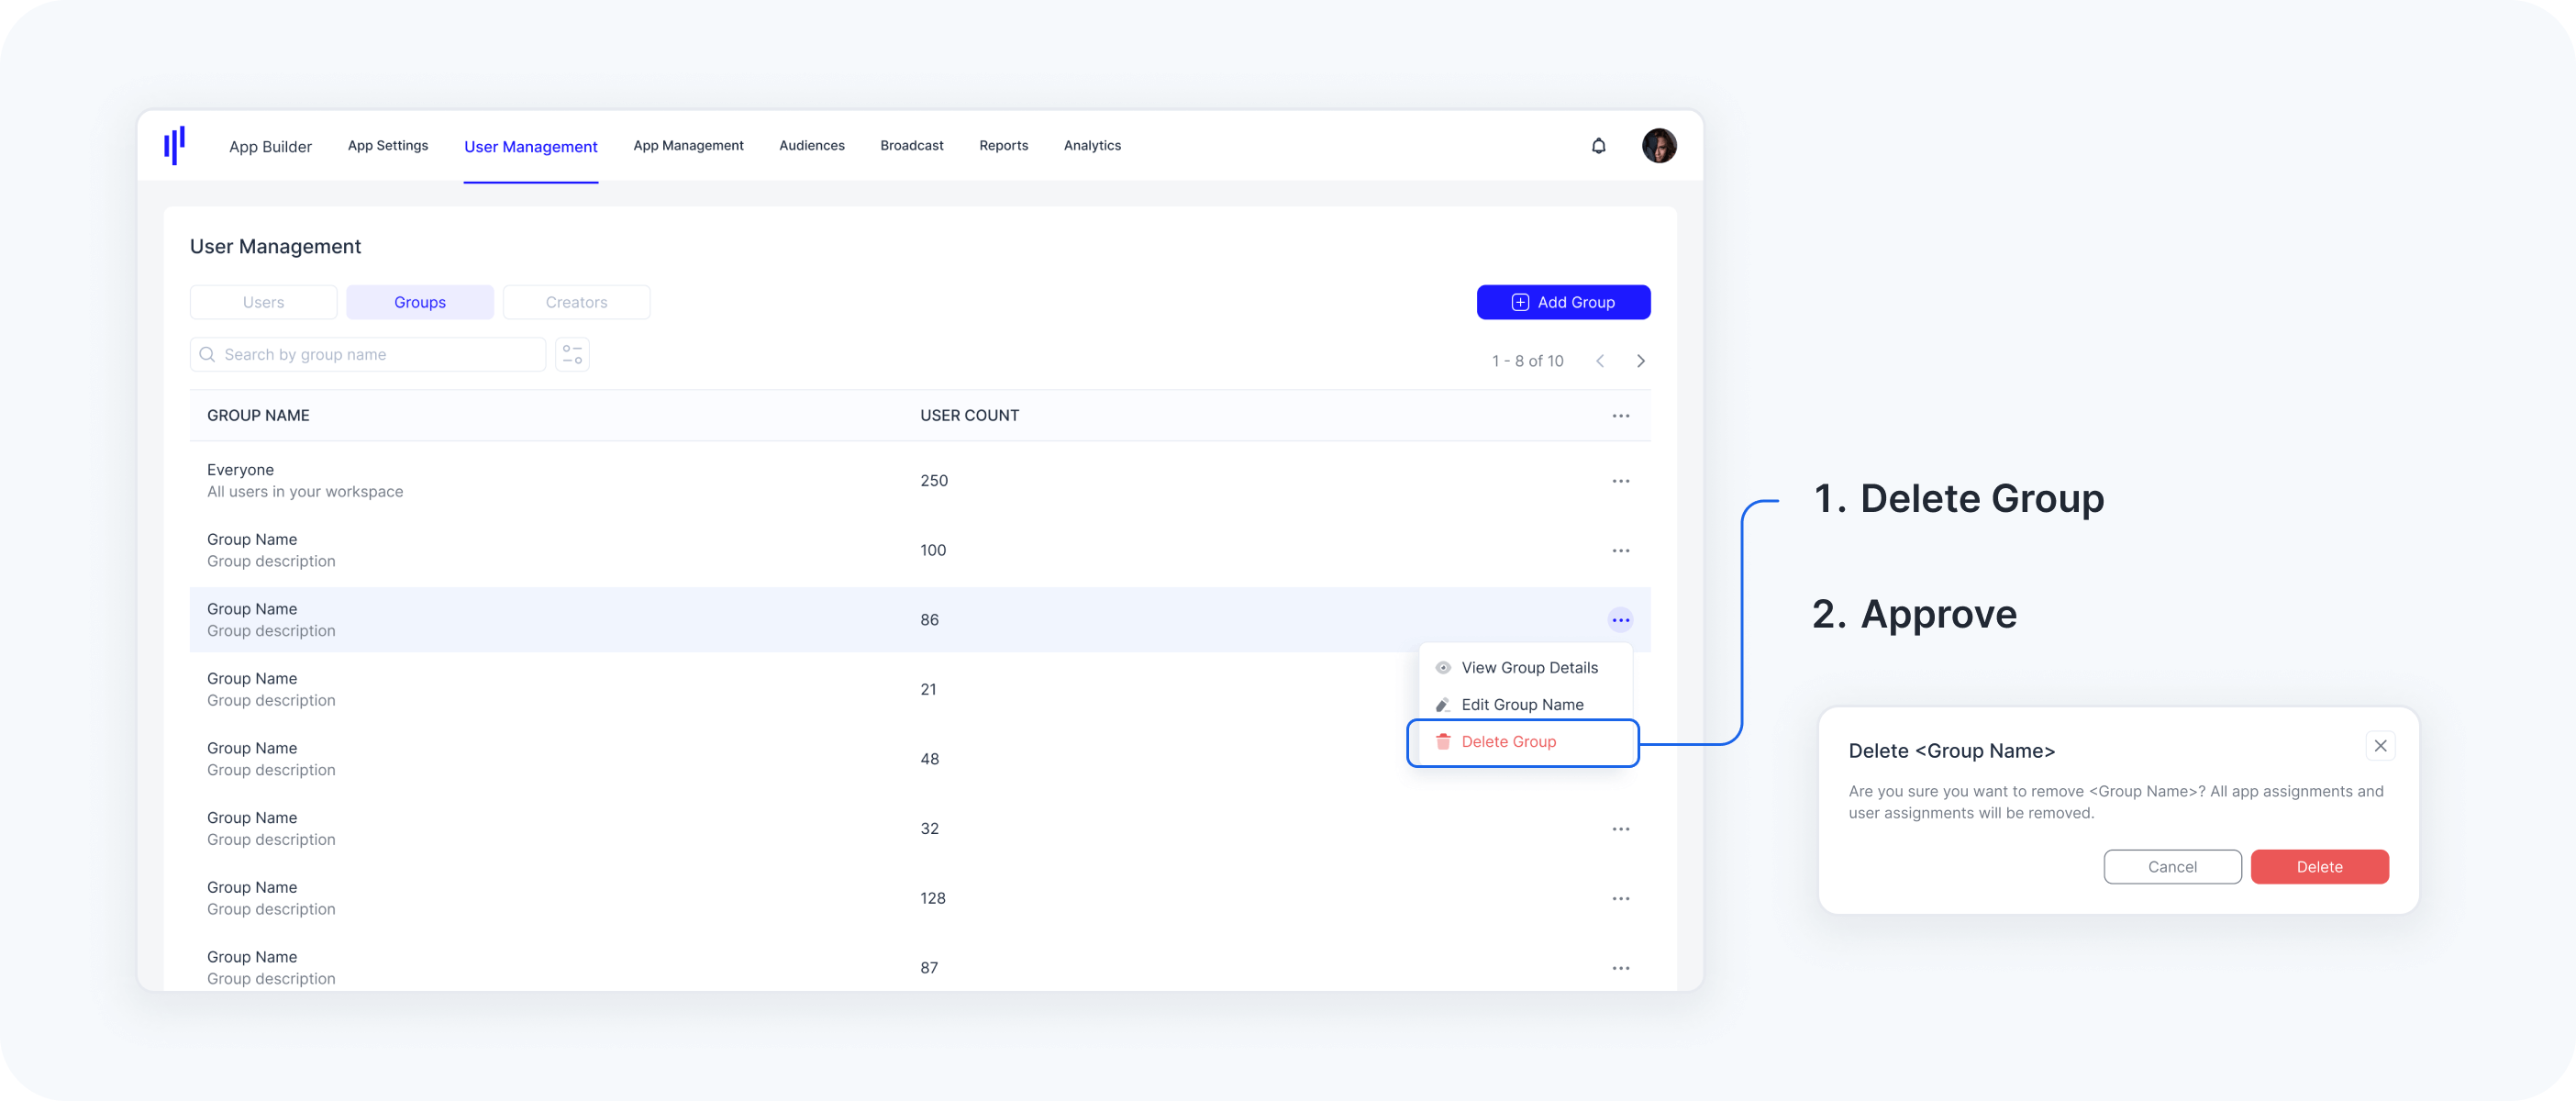
Delete a Group
Workspace Owners can delete groups that are no longer needed. Deleting a group removes all group-related permissions, though users in the group will remain in the workspace.
Steps to Delete a Group:
- Navigate to User Management.
- Go to the Groups tab.
- Search for and click on the group to see the additional actions.
- Select Delete Group from the additional actions.
- Approve the confirmation pop-up.
The group has now been deleted.
Group Restriction
Workspace Owners, acting as Super Admins, can enforce strict privacy controls through User Management Roles by restricting access to specific user data for Workspace Members. This is done using the Group mechanism, which allows for precise control over which groups and users are visible to each Workspace Member.
Users can be assigned to particular groups, and the Workspace Owner controls which groups and their associated users are visible to specific Workspace Members. Workspace Members with restricted access will not be able to view or access any information from the restricted groups, ensuring that sensitive data remains confidential. This approach strengthens security by minimizing the risk of unauthorized access to sensitive information.
These role assignments can be managed either during the initial invitation of a Workspace Member or by editing the user roles of existing members. This structure enhances both privacy and security by safeguarding sensitive data. Additionally, users can be automatically assigned to groups based on predefined user attributes. Learn more about Group Rules [here].
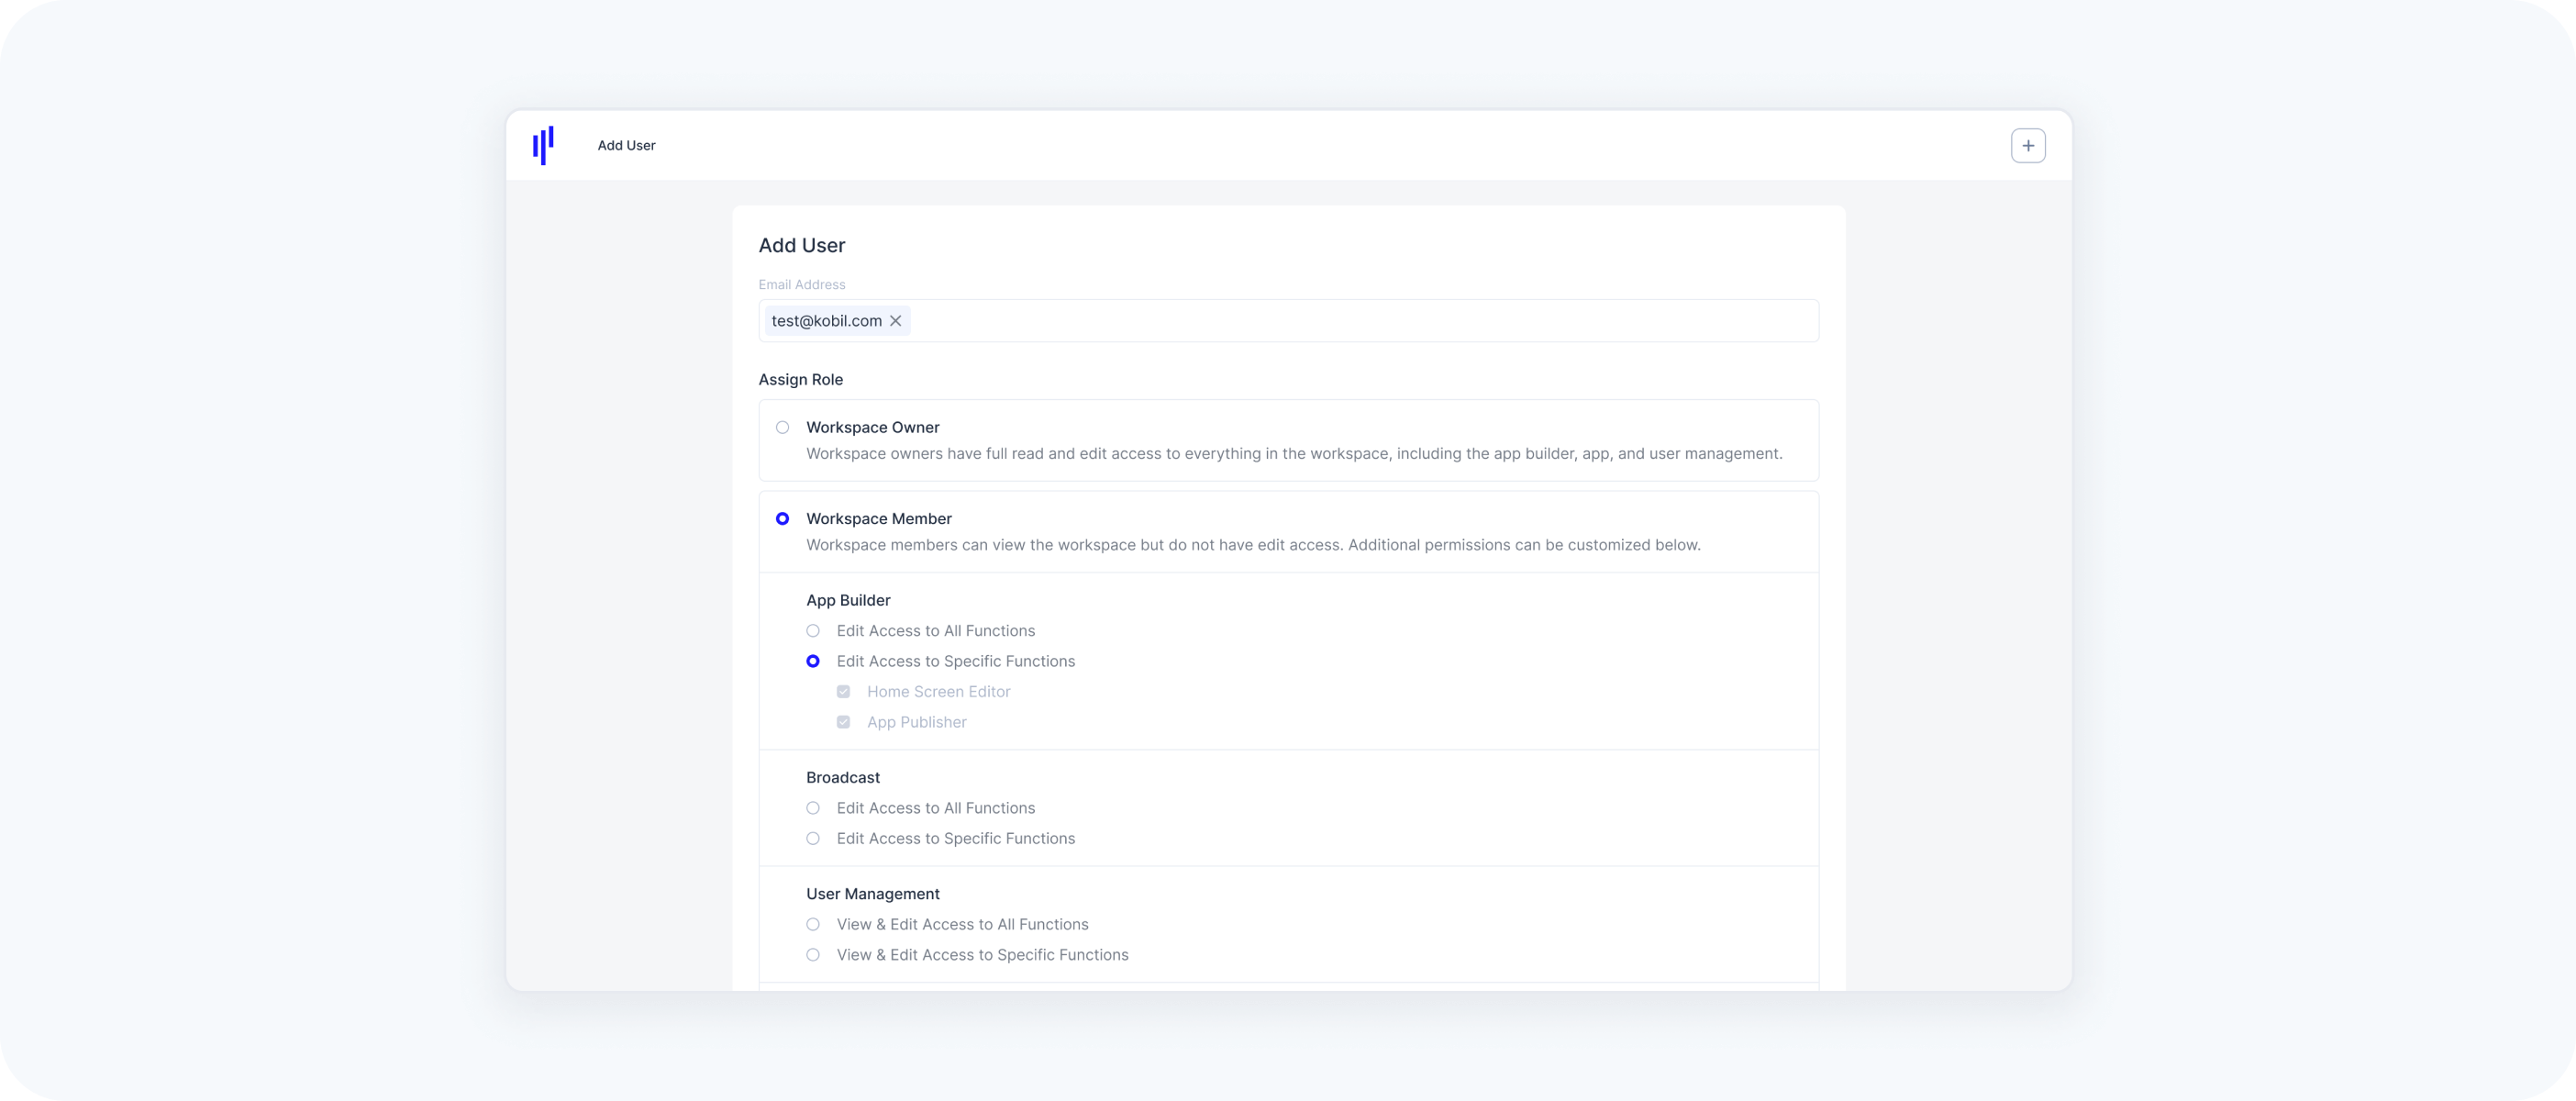
Steps to Invite a Workspace Member with Group Restrictions:
- Click Add User under User Management.
- Enter the email address of the invitee and select Workspace Member.
Choose View and Edit Access to Specific Functions under User Management.
Select Restricted Access to User Groups – The Workspace Owner can search for and select specific groups (multiple groups can be selected at once). The invited Workspace Member will not be able to see or access users or their information within the selected groups.
Click Save, then invite the Workspace Member – They will receive an invitation email.
Steps to Update Workspace Member Group Restrictions:
- Search for the Workspace Member under User Management → Users.
Click on the user to see Additional Settings, then select User Details.
Navigate to the User Roles tab and scroll down to select View and Edit Access to Specific Functions under User Management.
Select Restricted Access to User Groups – The Workspace Owner can search for and select specific groups (multiple groups can be selected at once). The Workspace Member will not be able to see or access users or their information within the selected groups.
Click Save – The Workspace Member’s permissions will be updated in real-time, reflecting the changes immediately.