Onboarding Details
This section provides flexible customization options for tailoring your app’s onboarding experience. Whether you wish to adjust the default onboarding flow or upload custom content, we offer these distinct ways to personalize the onboarding experience for your users:
1. Modify Default Onboarding Screens
2. Upload Custom HTML Content
By providing these flexible options, we enable you to deliver a tailored onboarding experience that fits your app's specific needs. Whether you prefer the simplicity of modifying default screens or building a custom flow from scratch, you can easily manage your app's user experience within the KOBIL Portal.


Customization Options
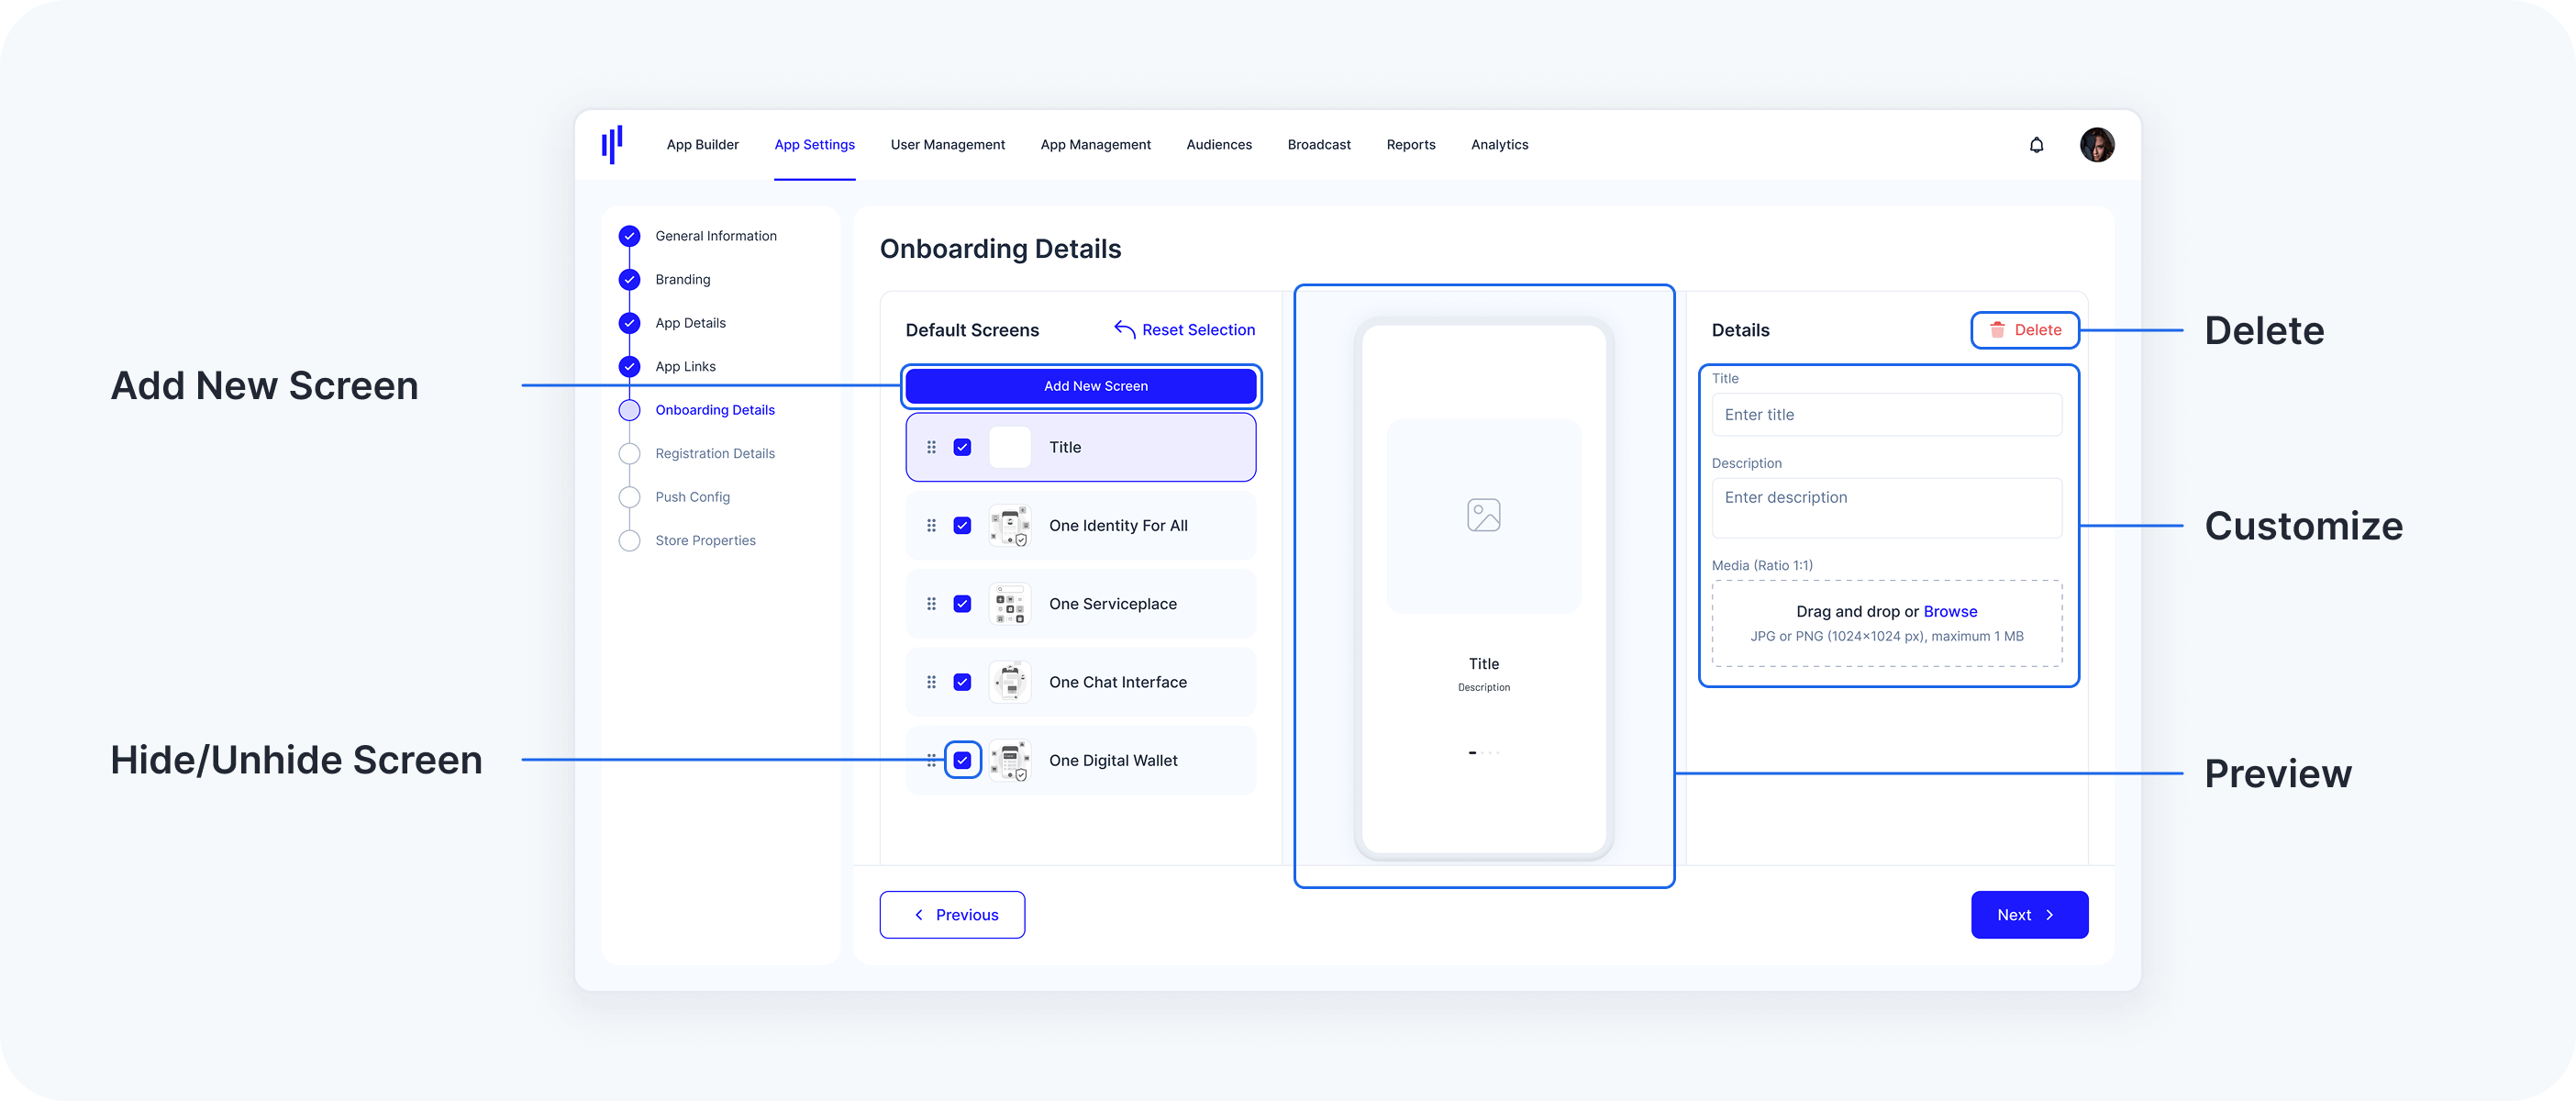
1. Use Default Screens
1. Use Default Screens
The Default Onboarding Screens provide a ready-to-use flow that you can easily personalize. You have the flexibility to add, remove, and modify screens. This option allows you to personalize the content for your users while maintaining a structured onboarding process.
How It Works
- Add/Remove Screens:
- You can add up to six screens to the default onboarding flow.
- Screens can be removed selectively.
There must always be at least one screen; the last screen cannot be deleted.
- Customize Screens:
Customize key components of each screen, including:
Title: Make sure it aligns with your app’s tone and message.
Description: Update with information that informs users.
Images: Only PNG and JPG files with a resolution of 1024x1024 pixels are supported for upload. You can customize the visual elements to align with your app’s branding and style.
- Preview Default Onboarding Screens:
Preview changes in real-time. You can see how the onboarding screens will appear with updated titles, descriptions, images, and any added/removed pages. This ensures you can fine-tune the experience before going live.
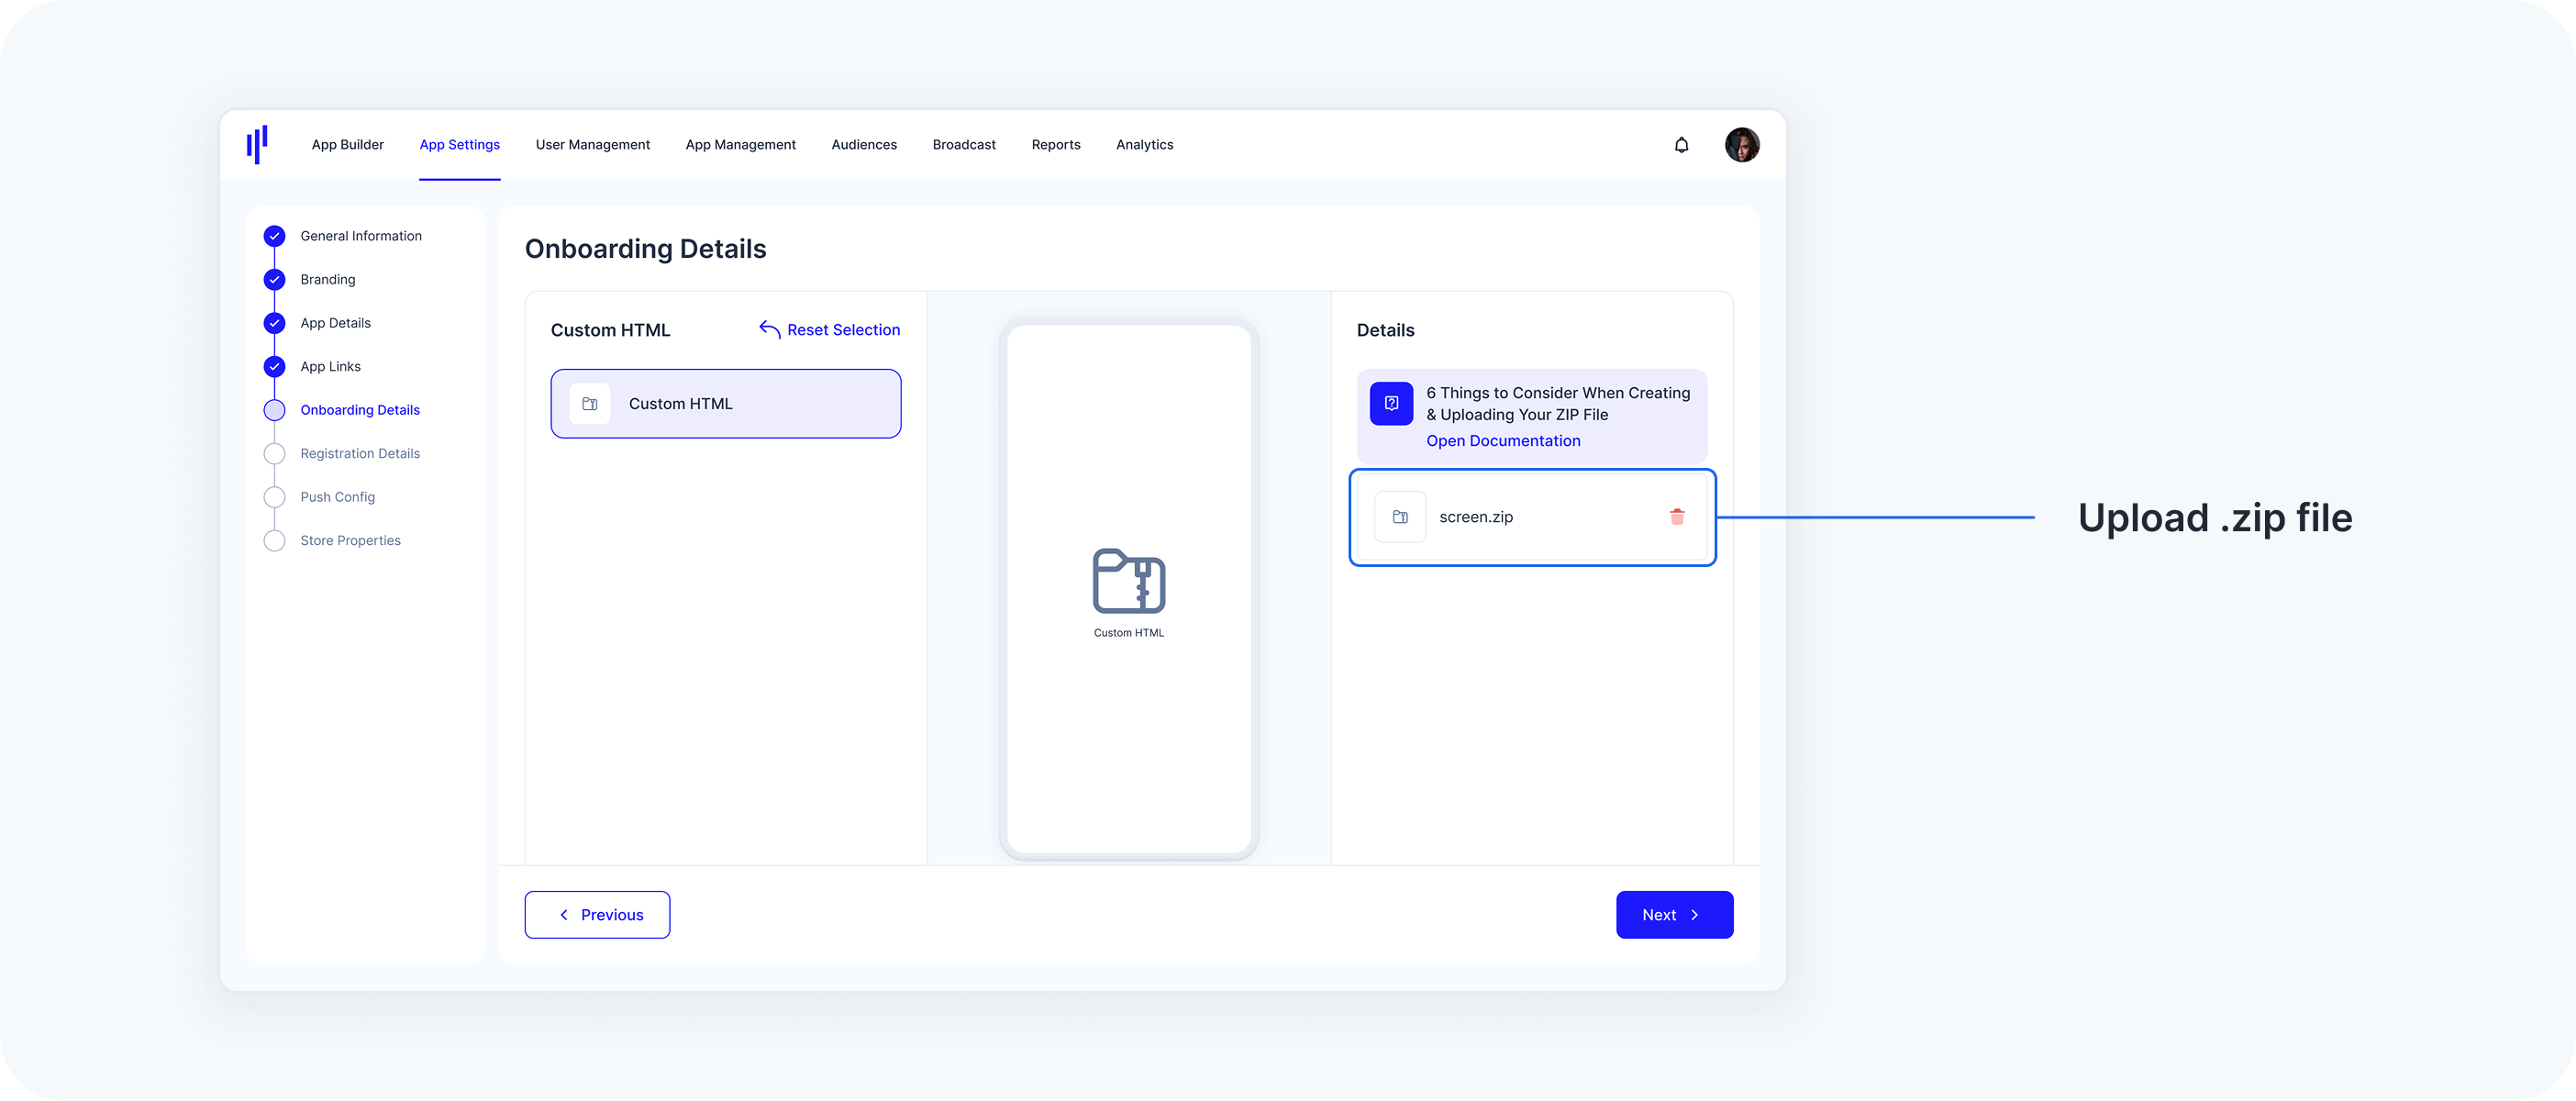
2. Upload Custom HTML
2. Upload Custom HTML
For complete creative control, you can upload your own custom onboarding screens in the form of HTML content. This option allows you to design a fully customized flow, giving you the freedom to implement unique layouts, styles, and interactive elements.
How It Works
- Create your custom onboarding content in HTML.
Package it as a .zip file, ensuring all files are correctly formatted and linked.
Upload the file to the Portal to replace the default onboarding screens with your custom flow.
This option is ideal if you need a highly specific design that deviates from the standard templates, allowing you to build a fully tailored onboarding experience for your users.
- Read more about the Custom HTML Content option.
Custom HTML Content
The .zip file should follow the structure outlined below:
Mandatory index.html File
The index.html file must be included at the root level of the zip file, not inside any folders.
It must be named exactly as specified; any deviations will result in rejection.
Assets
All assets (images, JSON files, etc.) referenced by index.html must also be at the same root level as index.html.
No folders should be present inside the zip file. Ensure all assets are directly at the root level.
[.zip file]
index.html
image1.png
image2.png
... (other assets, if any)
File Naming
The file name of index.html must match the specified name exactly. Any changes will lead to rejection.
JavaScript Callback
The custom HTML page should include a JavaScript callback triggered when the user clicks a button like "Let's Start" on the last onboarding page.
The callback should use this line of code: window.flutter_inappwebview.callHandler('onStartButtonPressed');.
window.flutter_inappwebview.callHandler('onStartButtonPressed');
Localization
The app supports multiple languages including English (en), Turkish (tr), and German (de).
- The HTML structure should include translations for these languages.
If not all supported languages are included, the zip package will still be accepted, but there may be language discrepancies between onboarding and the device language. This is not a blocking issue.
Rejection Criteria
Deviations from these guidelines, such as a missing index.html file or misplaced assets, will result in an error message and rejection.